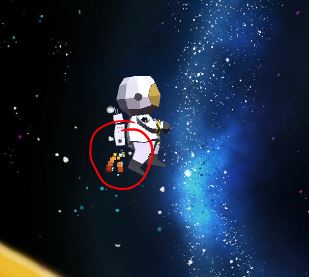
I added emissions to the astronaut and comet to recreate fire. I was inspired by this tutorial [Low Poly fire particle system] to make it look low poly so the style stays consistent.
We got homework on our very first class. We have to do some research on three games that we like: an in NZ developed game, Indie and AAA. NZ Game: Extinction Squad Pik Pok games: http://pikpok.com/ Join daredevil scientist Chuck Darwin's elite team of zoological defenders and embark on a globe-trotting adventure to rescue endangered animals from extinction. Dodos, gorillas, pandas, lions and more are GOING TO DIE unless you catch them with your official Extinction Squad trampoline and bounce them to safety. Miss and they will be nothing but bloody smears on the ground...and footnotes in the natural history books. Indie Game: Super Hot I found out about this game watching this reaction/gameplay video . I think the concept is very smart and it takes a bit of strategy to play. Also, although the visuals are really minimalistic, they're still very effective. Here's the trailer: A first-person virtual reality shooter in which time moves only when ...
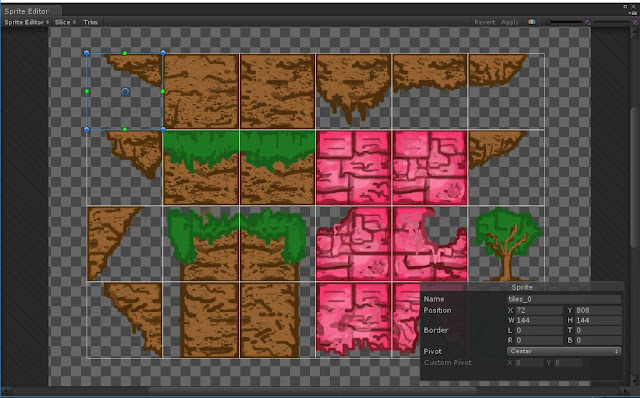
Today's class was pretty cool, even though it was a 2D technique: how to create tilemaps in Unity. And it really is easy, I was impressed. So the first thing to do is create the tiles in Photoshop. It is important to show the grid and rulers and to have the units in Pixels, so that we know exactly how big the squares and tiles are. Also it is better if we do not leave an offset between tiles and border of canvas because then we have to specify the offset in the Sprite Editor (which is not difficult but you can spare time). Then in the Sprite Editor instead of Automatic select Slice > Grid by Cell Size. We knew that the Pixel Size was (144px) and the offset was 72px. Then apply. Create > 2D Obejct > Tilemap. It will be under the created Grid. Open Window > Tile Palette. Now we can create palettes with different tiles to paint with. Create New Palette > save it in a new Folder "Palettes". Then select the tiles you need for that palette, like ...
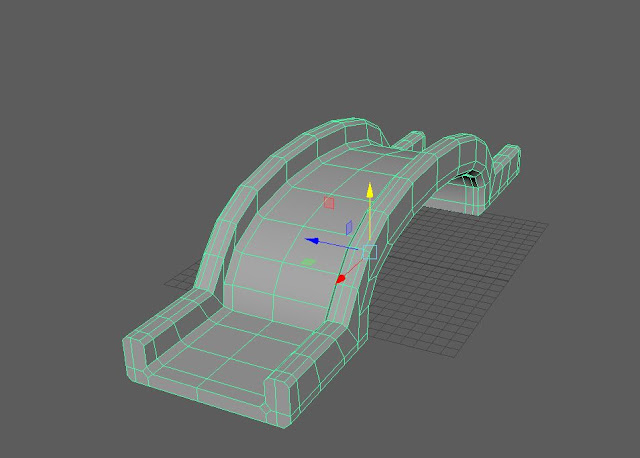
MUDBOX The first thing is import the the objects in Maya, in this case a low poly bridge. Delete the history and attributes and send it to Mudbox ( File > Send to Mudbox > Send as new scene ). Under the Select/Move Tools Tab click on the Scale tool and scale it 10x10x10, because the scale is different between Mudbox and Maya. Increase the Subdivision levels up to 5 with Shift+D . Create a new sculpt layer. Now we can start carving. Select the sculpt tool and some stamp, increase the Strength to 100 and make the size pretty small. Activate Invert Function and start carving the stones. After that I added a granulated texture with a very big brush and weak strength. Then import a rock texture for the stones and set it as a stencil or stamp. Under the Paint Tools tab select the Projection and start painting. Oh, and do this in a new diffuse Paint Layer . In a new Specular Paint Layer paint with the Paint Brush black where it is not shiny and whit...


Comments
Post a Comment