Posts

Showing posts from September, 2018

BSA227 - Week 8 | Introduction to Nuke

Image
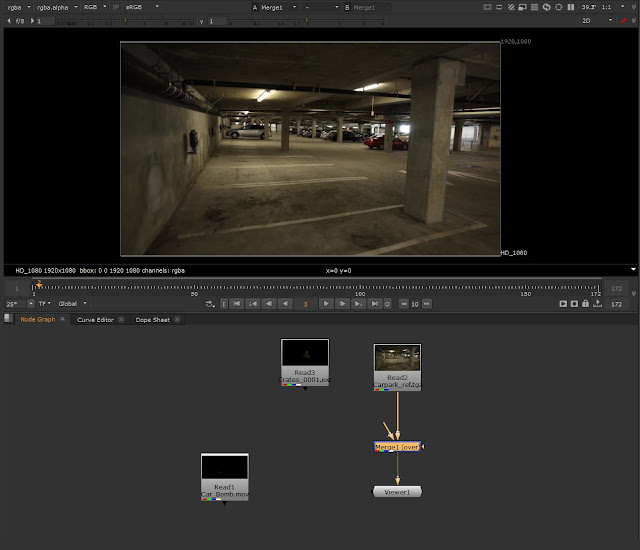
So Nuke is very different to After Effects because the workflow is with nodes instead of layers. To add a node press Tab and search for the name of the node. To import a file use a Read node. Use a Merge node to connect the file to the viewer node. The Merge node has two components, A and B. Use the B for backgrounds. Connect the second component with the fire file. Use a Transform node to scale it and place it somewhere else. Select a node and press D to make that node invisible (like visibility with layers). Use a Roto node to mask the column. All the options of the different nodes appear on the right side of the screen. Inverse the mask so the column is visible. If you want multiple masks, connect the node to the previous Roto . Connect a Grade node to the smoke file to make it blend better with the footage.

Gaming Art - Break | Rigging the astronaut

Image
The next step was rigging the astronaut. I'm gonna include a short explanation of how to rig a character because I didn't last semester and I forgot how it was, so here it is so I can look back into it in case I forget again: Before starting, make sure that the model is finished and that the history of every element is deleted .  Click on the Character Controls (the little man on the right) > Character and Source are None > Create Skeleton . Then adapt the number of fingers or spine bones and move them (press D to move a single bone instead of the hierarchy) to fit the character.  Once it's done, I like to group all the elements of the character. Select the group and the skeleton, go to the Rigging menu > Skin > Bind skin (click on the little box) > Set the influences to 3. This last step does not always work for some reason. I tried it a bunch of times and then one time suddenly it worked. Make sure that the options in the skeleton are

Gaming Art - Week 9 | Finished astronaut + Materials

Image
I put some materials on the finished astronaut to see how it would look like in Unity. The Arnold renderer is not trangerible to Unity, I'll have to create my own materials on Unity or download a package of the Unity Store, but I wanted to have an idea. And here are some renders. I set up the samples very high and the image is still very noisy, I do not know exactly why. And here's a render after changing the bracelet's design! I think it looks more cohesive this way, since they look like the knee pads. I also hardened the edges of the model to make it look more Low Poly ( Mesh Display > Harden Edge )

BSA227 - Week 8 | Saber

Image
Create a black Solid and add a Saber effect.   This effect does not have to be necessarily only a saber, under the Select Tab there are a lot of options (fire, lightning,  cool light effects) that can be used. So the next thing is create a form, I created a circle. Under Customize Type change the Core Type to Layer Masks to attach the effect to the form. Then I deleted the circle and create a different form with the Pen Tool . Duplicate the Saber effect and change the color on the second one. Then edit the End and Start Points to make it half and half. And then add keyframes so that the meet in the middle. This works with text too. Change the Core Type to Text Layer instead and then select the text layer (the 2nd layer in this case). To blend it with the background change the Composite Settings to Add and the Alpha Mode to Mask Glow . The last thing we did is to make it look like an hologram. So create a square around the text and attach the eff

Gaming Art - Week 8 | Modelling the astronaut and backpack + Animations list

Image
We're gonna have to make animation trees in Unity once we start building in the assets and characters and everything, so I made a small list of the things I think I may need to animate soon. Astronaut's animations: hit dead shoot movement Enemies' animations rotate Boss: lights to spikes Also I kept modeling stuff! The astronaut's backpack and the astronaut. I really like how the backpack turned out.  Then I made a quick comparison of the astronaut's head in 3 mode and I did not dislike it at first, so I was unsure of how to leave it. But I sent both models to Unity to compare them in the Unity render with the Unity's lighting and the first one looks better, since it's more consistent with the low poly style.